Component 2 - Connected Images
I began my project looking at the connecting images question by researching. I looked at different photographers whose work fell into the ‘connected images’ category, such as Gordon Parks and Patrick Winfield. I also explored different ways of interpreting the term ‘connected images’, which I did through looking at the different ways artists and photographs have connected images in the past, and different techniques I knew of which involve connecting images.
Diptychs were the first technique that came to mind when I began thinking about the connected images questions, as well as triptychs and placing several different images next to each other which acquire new meaning through their juxtaposition. Diptychs are one of my favourite ways of displaying photography so I researched them through looking at specific diptychs and triptychs (etc.) which I like, as well as making several of my own diptychs. Making my own diptychs began with me simply placing two images taken at a similar time next to each other with the link between the two being similar lighting or subject.
After making several diptychs in this way I found that my images were lacking in having the images tell some kind of short story created by the placement of the photos, as that is the goal of many diptychs. I began making taking photos with the intention of turning them into diptychs which helped me shoot things in a sequence, or capture actions taking place so I can show a process occurring in the photos. I made a few diptychs where the first image was at a distance and the second was closer view or pulling closer in on a detail of the subject.
|
|
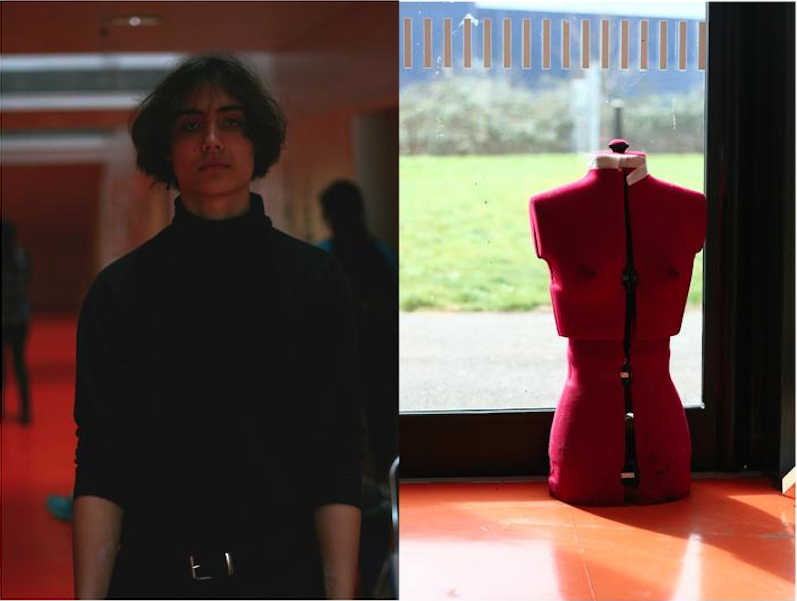
The next step I took to making my own diptychs was trying to find more creative ways to link the pictures I was juxtaposing. Diptychs are interesting to experiment with because you can easily switch which element of the photograph you want to connect the two images with. I was interested in rather than having the images colour or subject be similar, having two images with similar compositions. I took a shot of a boy from the waist up standing facing the camera and put it next to a shot of a mannequin torso and lined the two torsos up to create one of my diptychs.
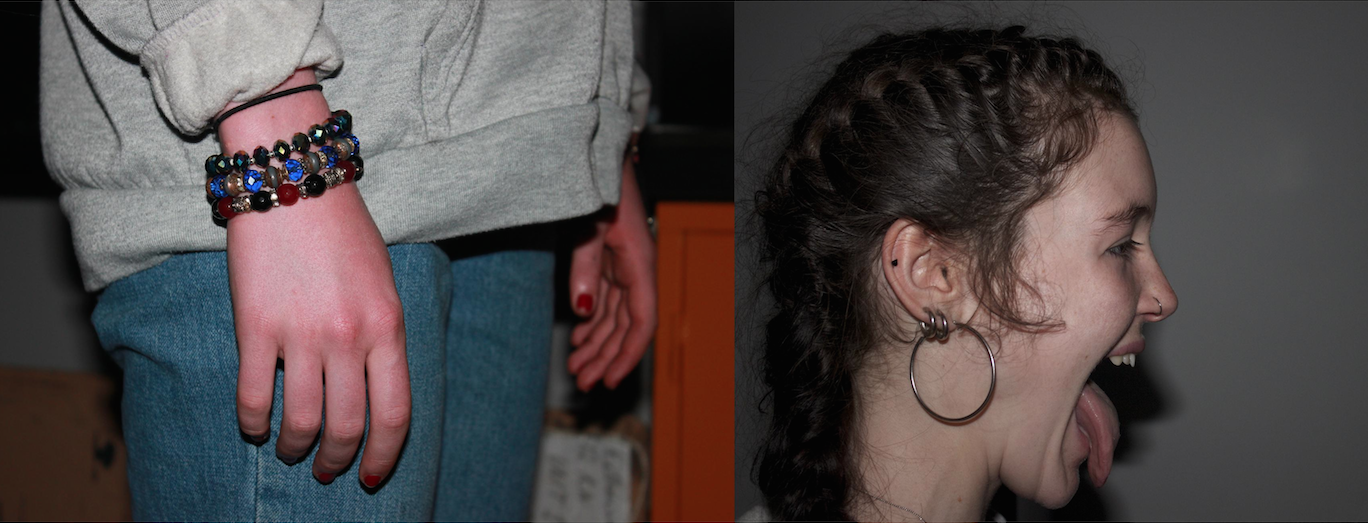
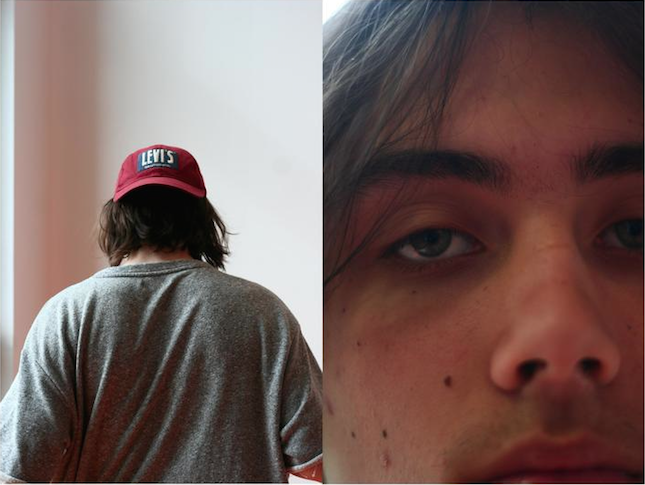
Another diptych I made was a picture of a boy’s back and the back of his head, next to a big close up on a boys face. I connected these two images because the first image was faceless as the face is the only missing feature of the subject we are seeing, and a connected it to an image that was just face. You can’t see the identity of the first image and you can for the second but you don’t know if the identities match.
|
|
I also experimented with making diptychs where the two images had different dimensions.
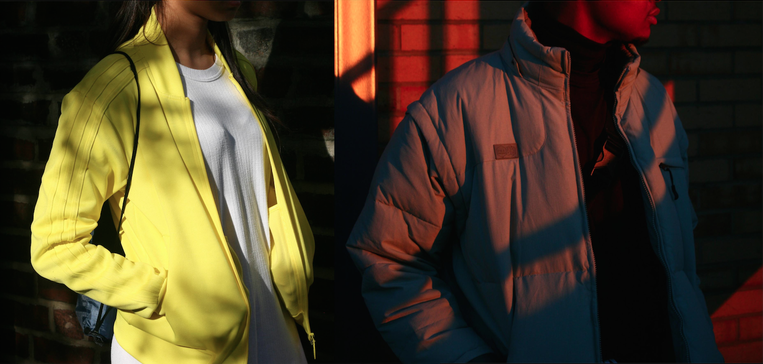
I was also interested in making diptychs where the two images begin to blend into one so I attempted achieving this effect. I put two images of different subjects from the chin to the waist, next to one another. Both photos were taken from the same angle and I cropped the images so that the dimensions were the same on the jackets worn by the subjects. Both images were taken with sunlight shining directly onto the subject, but the light was slightly obscured so shadows are made. The two subjects both had black on either side of them so I was able to connect both images in a way so that it appeared as one large image of two subjects.
I was also interested in making diptychs where the two images begin to blend into one so I attempted achieving this effect. I put two images of different subjects from the chin to the waist, next to one another. Both photos were taken from the same angle and I cropped the images so that the dimensions were the same on the jackets worn by the subjects. Both images were taken with sunlight shining directly onto the subject, but the light was slightly obscured so shadows are made. The two subjects both had black on either side of them so I was able to connect both images in a way so that it appeared as one large image of two subjects.
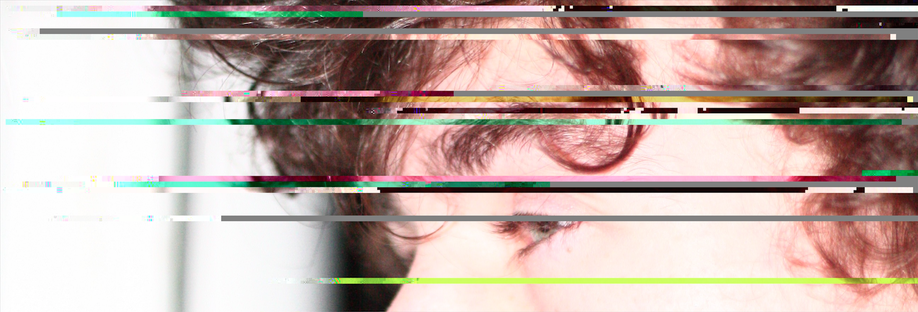
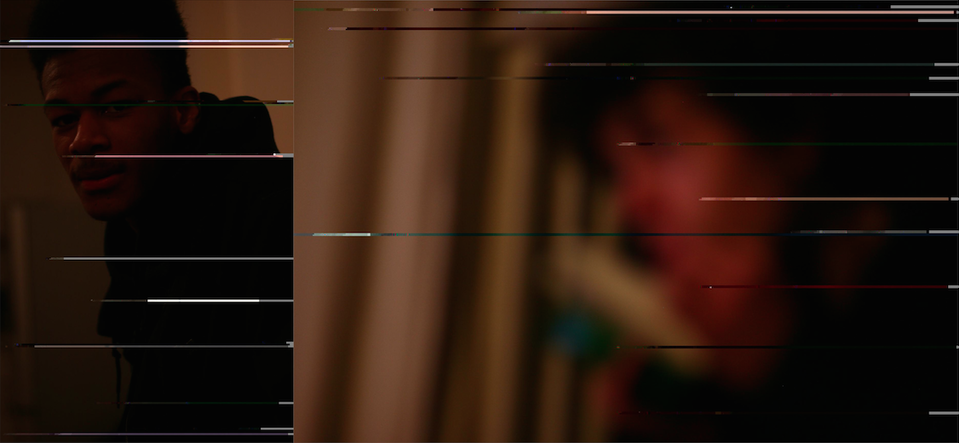
Another way I experimented with different ways of connecting images was with glitched images. I edited some photos I took so that they appeared “glitched” like the pixels had been corrupted, to make long multi coloured lines stretching across the image. I wanted to see if I could connect the separate images together by lining up the glitched lines so that they went from one photo to another. Also around the glitch idea, I edited some images so that half the image is pixelated and the other half in clear, connecting two versions of the same image.
|
|
|
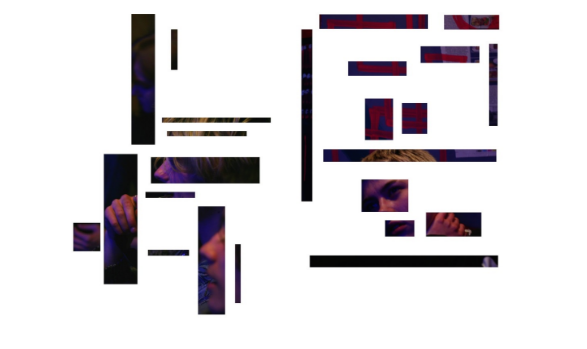
Another way I explored connecting images was taking one image aiming to get an image with lots of separate small details. Then I cropped the image so that you can only see certain sections, as if you’re looking through lots of little holes with the image behind. In this way each box a made is a separate image and they’re connected through being like jigsaw pieces of a whole. This example is a combination of the idea of cutting holes in a whole image, as well as a diptych, as I have put two of those besides one each other.
I looked into the photo collage as it comes under connected images as the artists is pulling together small segments of a lot of different images to put into one big image. Photo collages are often surreal and experimental in appearance due to them being essentially a fictional images. Photo collages a lot of the time have similar aesthetics, looking very cut-up and colourful and artists cram a lot into their collages, pulling from many different places, like magazines, newspapers and books. They can contain a mixture of text and images. Below is a photo collage by Matt Murtagh.
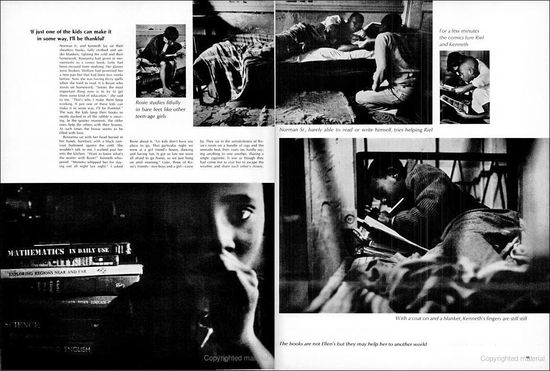
A photo essay is essentially what the name implies. An account told predominantly through photographs, sometimes with text to go with it. Photo essays are usually used to provoke emotions in viewers with the photos often being powerful and striking. Photo essays can range from just photos telling a story, to photos with captions to long form essays with photos to illustrate the point. Examples of mediums for photo essays include articles, books and webpages. Below is an example of a photo essay from Gordon Parks
A diptych is when one image is placed with another, with a triptych being three images placed together etc. They are often used for photographic story telling. You can use photos from the same session which have an obvious link, and tell a story or bring focus to a key part of the overall image, or you can use completely opposing images to show contrasting ideas to create new meaning. The purpose of a diptych is to show a link between images used and how the juxtaposition of images makes for a new image. A diptych (or triptych) can tell a story through a sequence where the images just follow on from each other, or can show a series of seemingly unconnected images at face value but the viewer is forced to try and find the link. Diptychs a perfect examples of connected images.
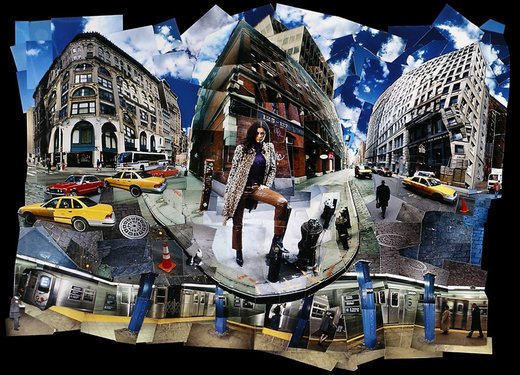
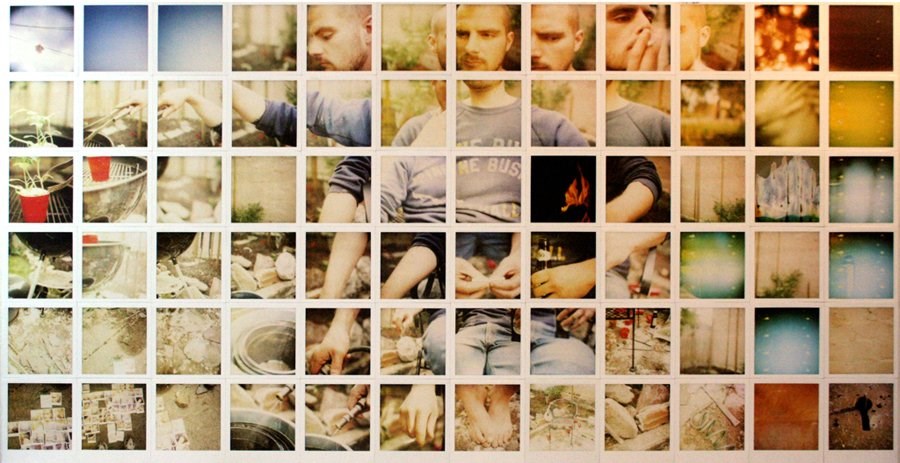
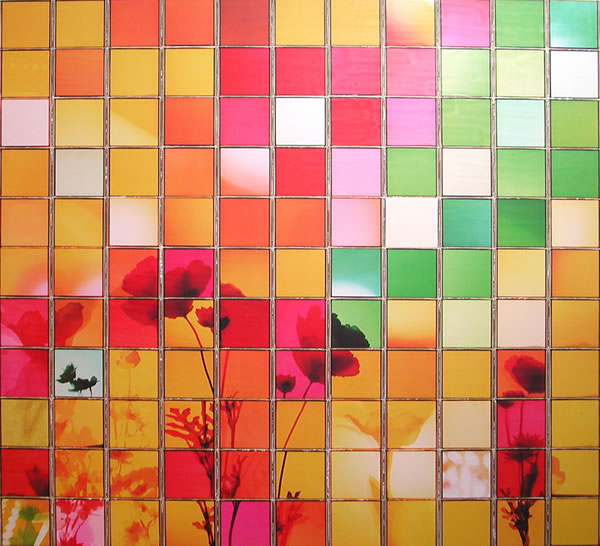
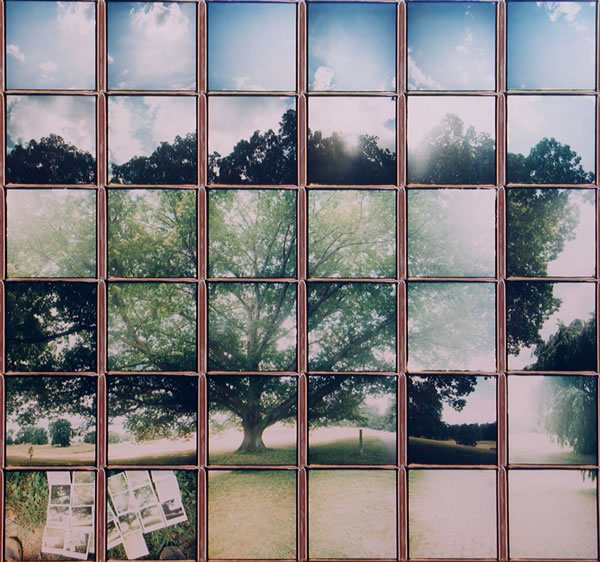
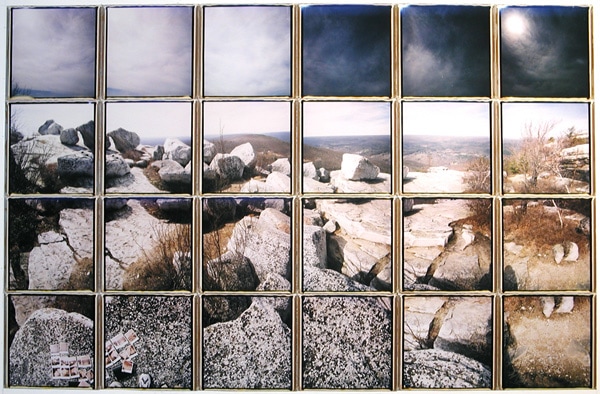
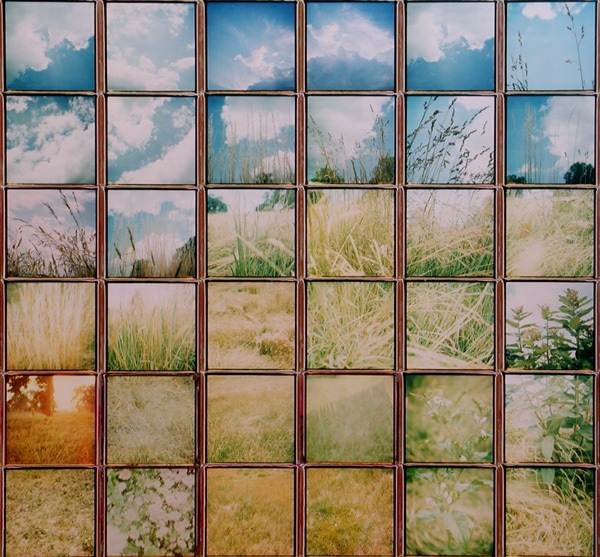
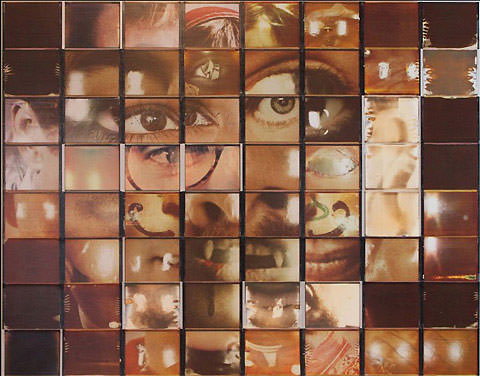
Polaroid composites are similar to photo collages in that they a big image made up of several smaller images but they differ in that rather than the artist recycling lots of parts of images they found, they take their own images and assemble them together, often not completely evenly but in an experimental way where you can see the complete image but it still looks surreal. Below are some polaroid composites from Patrick Winfield.


Exam
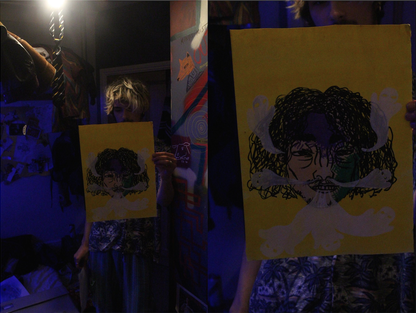
For my exam piece, I wanted to explore the relationship between environment and artist through connected images. I decided to interview two (visual and musical) artists I knew while taking photos of them, in a “character portrait” manner. The subject of the interviews was around the question of what environment means to an artist and I asked them how about how their environment impacts their art, so the aim of the photographs I took was to capture the artist in their environment/space. One of the artists does a lot of his work in his room and uses the walls of his room as I canvas so I decided to conduct the interview and take the photos in his room and I wanted to photos to capture the colour, lighting and mood of the space.
I shot and conducted the other interview in an outdoor space where I simply walked around an area frequented by the artists. I wanted to explore both interior and exterior environments through these photos and interviews so I questioned the artists about the impact of an artist’s area and neighbourhood, as well as the impact of their more internal environment being their house or room. I also shot differently depending on whether I was inside or out as I shot more close ups and tighter shots when inside to give the images the feel of a room with things being close together and the walls surrounding, whereas outside I had more wide shots and less close ups.
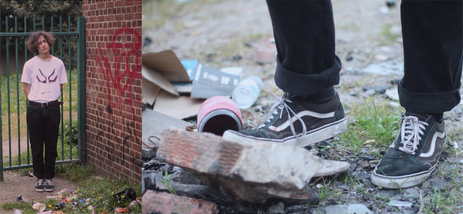
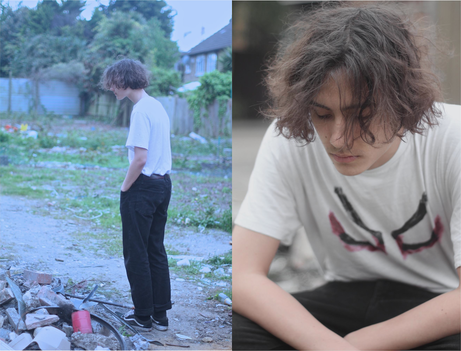
For the first, outdoor, interview, a recurring subject, due to the area we were shooting in was litter and waste. As the interviewee was talking he was walking around the location looking at things and sometimes describing what he saw so I wanted to take capture some images in a documentary style where my subject is not looking at the camera, going about his business.
I made this diptych to show a sequence of events, that being my subject looking in a rubbish heap and then kneeling to get a closer inspection.
I shot and conducted the other interview in an outdoor space where I simply walked around an area frequented by the artists. I wanted to explore both interior and exterior environments through these photos and interviews so I questioned the artists about the impact of an artist’s area and neighbourhood, as well as the impact of their more internal environment being their house or room. I also shot differently depending on whether I was inside or out as I shot more close ups and tighter shots when inside to give the images the feel of a room with things being close together and the walls surrounding, whereas outside I had more wide shots and less close ups.
For the first, outdoor, interview, a recurring subject, due to the area we were shooting in was litter and waste. As the interviewee was talking he was walking around the location looking at things and sometimes describing what he saw so I wanted to take capture some images in a documentary style where my subject is not looking at the camera, going about his business.
I made this diptych to show a sequence of events, that being my subject looking in a rubbish heap and then kneeling to get a closer inspection.
|
|
I felt these two shots accompanied well the part of the interview where we spoke about waste. In the second diptych I decided to take one longshot including the entire body of the subject and the litter on the ground at the bottom of the frame and then put it next to a close up of the subjects feet and the rubbish again, bigger in the frame this time. For the first diptych I wanted to show an action, in the second I wanted to highlight a feature of the frame and subject.
|
|
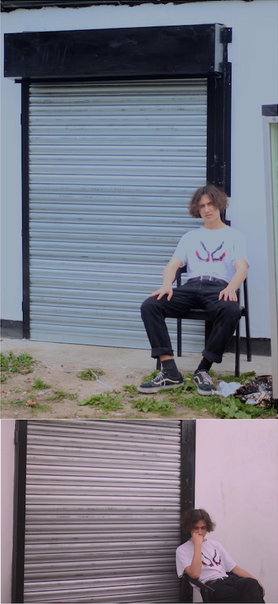
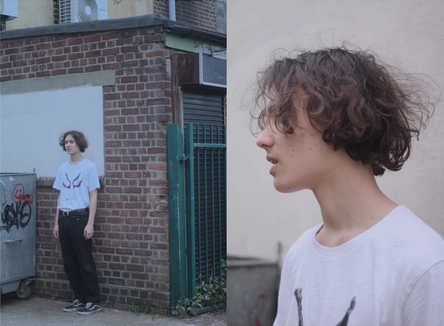
For these images I tried using more line in the composition. I found some walls to use as backdrops which had squares on them. For the first diptych the square is the garage which I had my subject sit on the corner of. I used this garage because I like the how the texture of the many parallel lines looked on camera and it was interesting to place my subject amongst that. For the second I had my subject stand against a wall with a square of concrete behind his head and in the accompanying picture I took a close up with just the subjects face/top of body, plus the square of concrete in frame. The aim of the close up is to show how the environment the subject looks like he is in changes with perspective.
I arranged a series of shots of my subject, documenting him going through the process of rolling a cigarette. While I was researching the connected images questions I looked at a lot of diptychs and made my own and the aim of many diptychs is to tell a story. Here rather than placing two images besides each other I arranged 6 images and ordered them so they read like a comic book. When shooting for the exam I wanted to capture a character portrait of my subject, by highlighting different features of their person. I did this through using close ups to focus on elements like hands and rings, I shot from several angles and played with lights to change the way the shadows look.
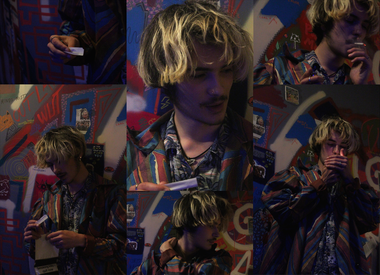
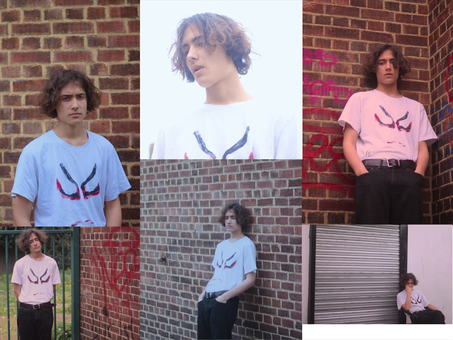
A focus of this shoot was texture and colour I especially wanted the mood created by lighting to be a theme of the shots. In the sequence of six shots of Jake I placed him in the foreground wearing a colourful jacket covered the stripes of blue, red and yellow among others. I put my subject in front of a wall with a similar colourful texture as his jacket so they would blend into one another in the photos. In the brighter shots in the sequence I used a deep depth of field so the entire image would be in focus. In the interview I was recording as I took the photos we talked about Basquiat’s influence on Jake as an artist and the work on this wall, which was inspired by Basquiat so shooting in this fashion fitted with the theme of Basquiat because you almost can’t tell where the jacket stops and the wall starts and it all ends up merging into one texture of different lines and colours, like a Basquiat piece. The whole image being in focus makes it work whereas if it was a shallow depth of field this effect would be ruined. Collaging multiple images next to each other also contributed to the “Basquiat” effect because the images look like they’re overlapping each other.
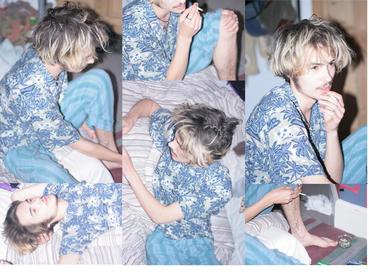
While taken photos for the interview I felt it was important to capture the mood of the space in which we were conducting the interview and I wanted to capture movements of my subjects. The intention of the series of photos above was to take photos of my subject from a few different sides in the style of a character portrait, again highlighting details. I first used flash because the lighting was low and my camera was struggling to focus and I originally didn’t want to use flash because as I said before, I wanted to capture the mood of the space and lighting is key in that, but after using flash I saw the photos were much clearer.
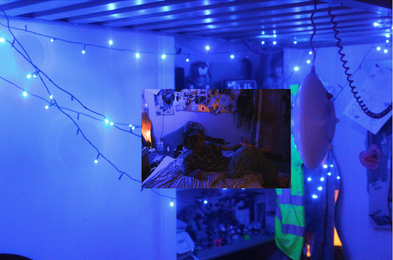
For this image I decided to connect the images in a different way than previous. As I said before this interview was focussed around an interior environment and I was attempting to show the artist in their environment through connected images so I took an image of the corner of the artist's room without the artist in frame. Then I took a long shot showing the artist’s whole body lying on his bed and instead of juxtaposing the images I put one on top of the other. Here I was trying to display the artist in his environment by showing the image of the artist literally “in” his environment as the image of the subject is surrounded by the image of the room. I also wanted this image to appear dreamy and spacey as the blue lights in the room look like stars and make the colour of the room somewhat cosmic. I wanted the image to look like the artist was floating in space as in part of our conversation in the interview we spoke about how finding ideas for art can be like pulling ideas from space, so I reflected this idea in the image.
For this image I decided to connect the images in a different way than previous. As I said before this interview was focussed around an interior environment and I was attempting to show the artist in their environment through connected images so I took an image of the corner of the artist's room without the artist in frame. Then I took a long shot showing the artist’s whole body lying on his bed and instead of juxtaposing the images I put one on top of the other. Here I was trying to display the artist in his environment by showing the image of the artist literally “in” his environment as the image of the subject is surrounded by the image of the room. I also wanted this image to appear dreamy and spacey as the blue lights in the room look like stars and make the colour of the room somewhat cosmic. I wanted the image to look like the artist was floating in space as in part of our conversation in the interview we spoke about how finding ideas for art can be like pulling ideas from space, so I reflected this idea in the image.